Importing eWallet GO! data into eWallet on Android
Looking to upgrade from eWallet GO!® to full eWallet® on your Android device but need to import your data? You’ve found the right article!
(Please note that this feature requires eWallet 8 or higher for Android.)
Summary
If you already have the data on your PC or Mac, you can use eWallet’s built-in importer there to import your data (File->Import). Alternatively, you can do the import all on your device using the Dropbox client and email.
Step-by-Step
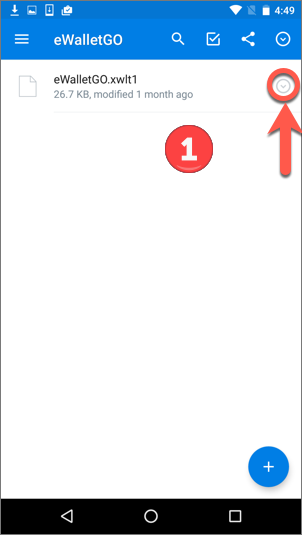
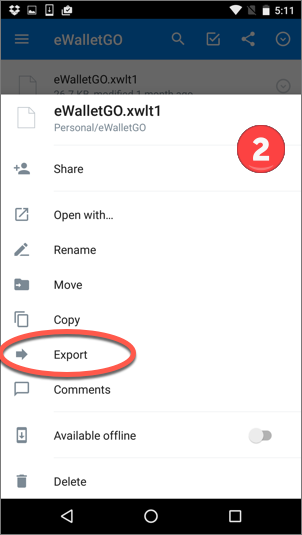
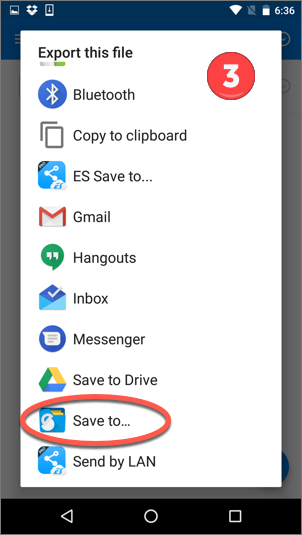
Without email, using Dropbox app

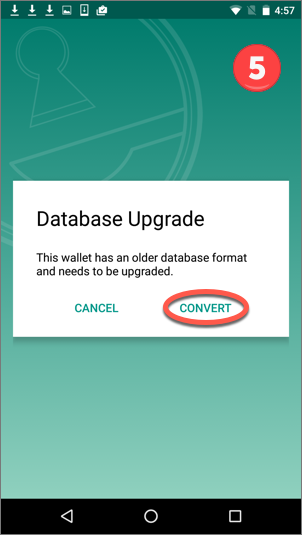
Then, start eWallet and you’ll see:
You should be all set now with your data imported into ewallet.
Note: Once the wallet has been imported/converted, you can change its name within eWallet if you like.
Next, it’s time to do the one-time setup of cloud sync.
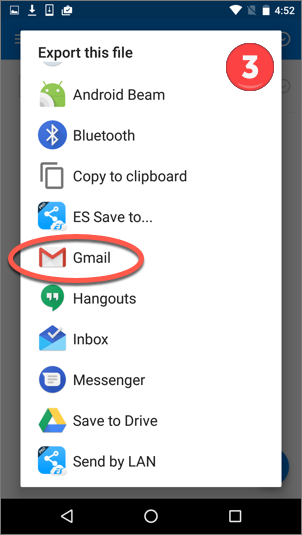
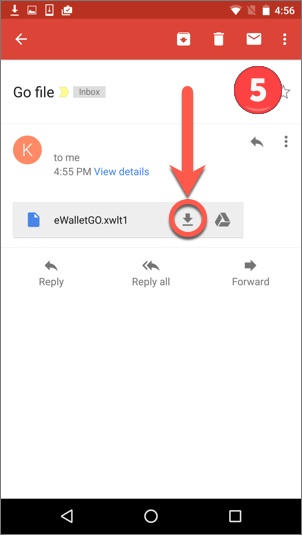
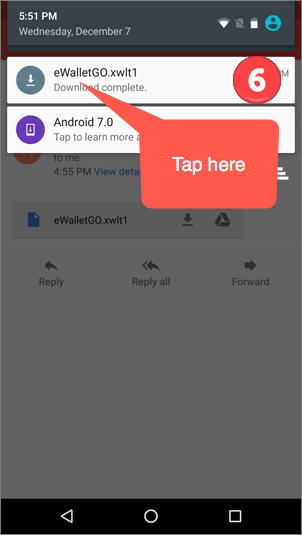
Using email
This option uses a “GO” attachment in email as a way to import into full eWallet.

You should be all set now with your data imported into ewallet.
Note: Once the wallet has been imported/converted, you can change its name within eWallet if you like.
- Android